
The kitchen remodel project in Fremont was recently completed. This week I was able to take some pictures of the completed project. But before we look at the pictures of where we ended up, let’s look at the pictures of where we started. The original 1975 vintage kitchen had some problems as can be seen in the photograph below. First, it was small. Although the room is 10 by 13, the kitchen itself was pushed into one end and only used about half of the room. For a couple who enjoy cooking and entertaining, this made things very difficult. Along with the elderly appliances, there was insufficient counter space for a two cook kitchen and far too little storage.
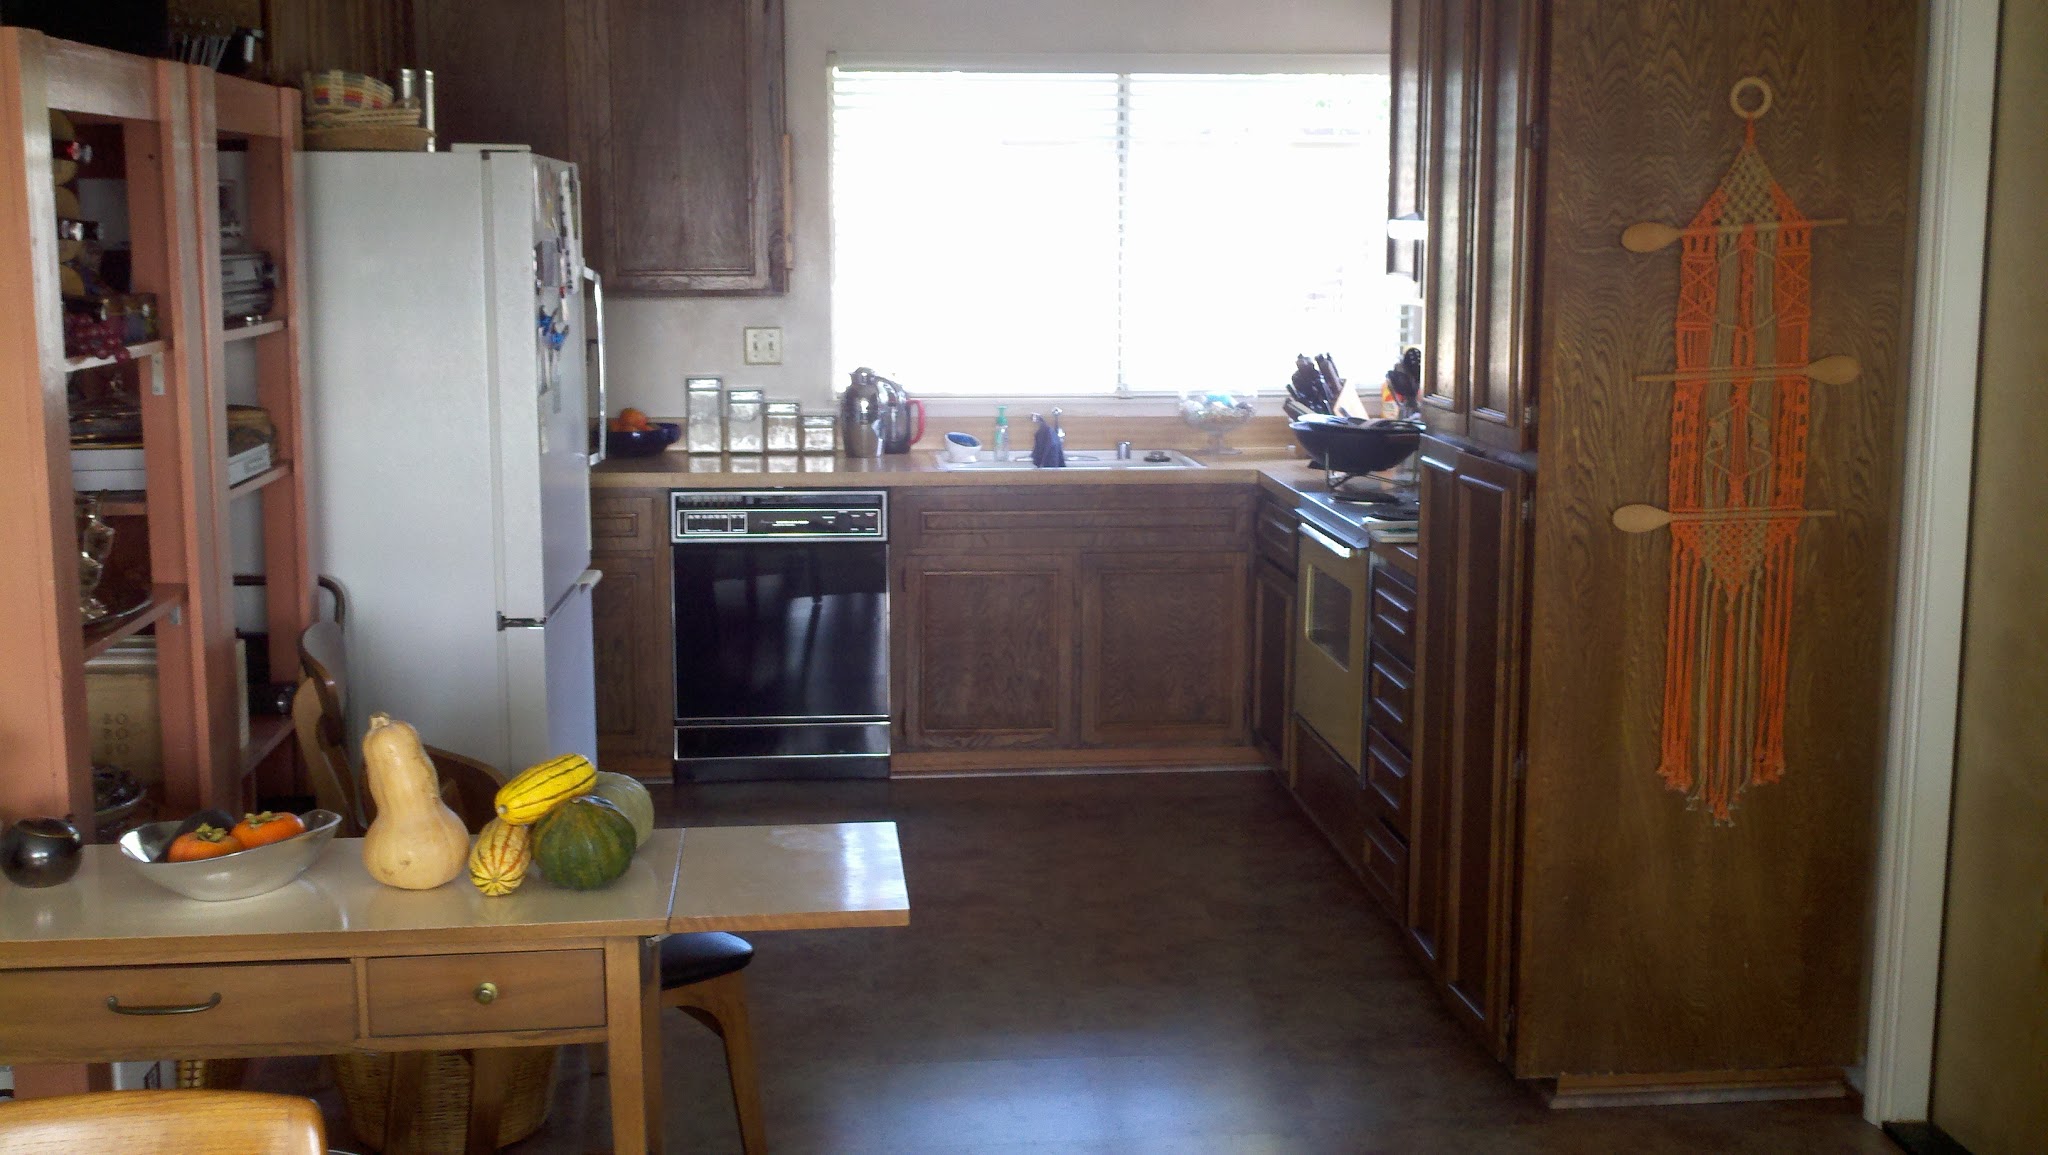
The existing kitchen is cramped and only uses about half of the room.
With careful consideration, and with input from the Contractor about construct-ability and relative costs, we came up with the design illustrated below. First, we captured all of the wall space in the kitchen for counters and cabinets. Second, we introduced a peninsula between the kitchen and the dining room. The peninsula has a double duty function: first, as counter space for baking and, second, as a buffet when entertaining.
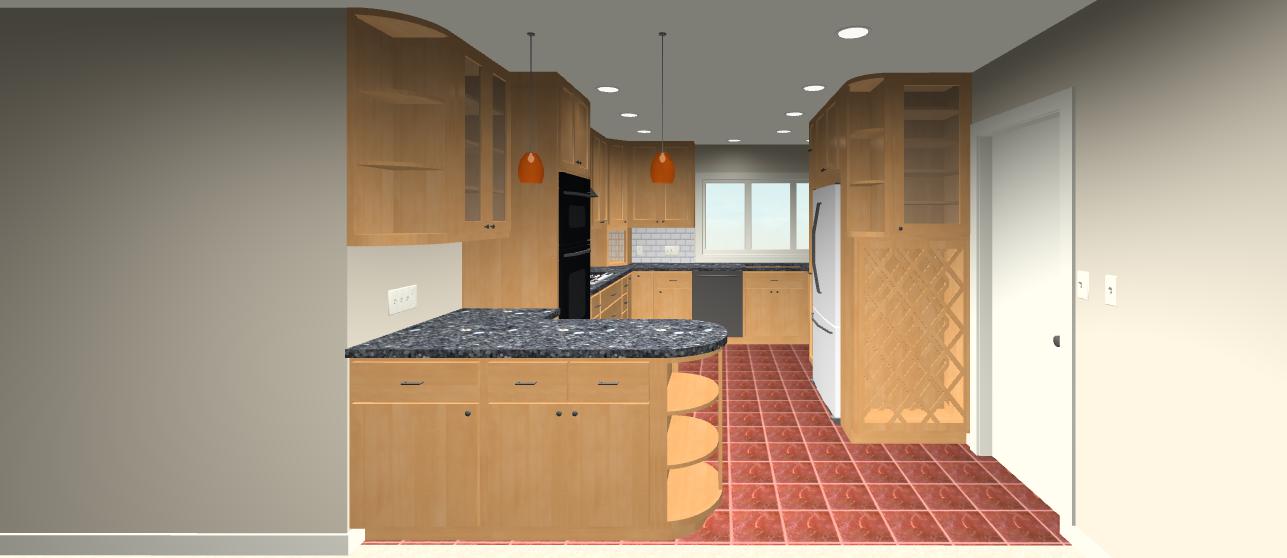
The proposed design uses all the wall space and doubles the amount of storage.
We started designing the project in January. We applied for and received a permit in late April. Construction began in mid-May. Construction was completed in August.
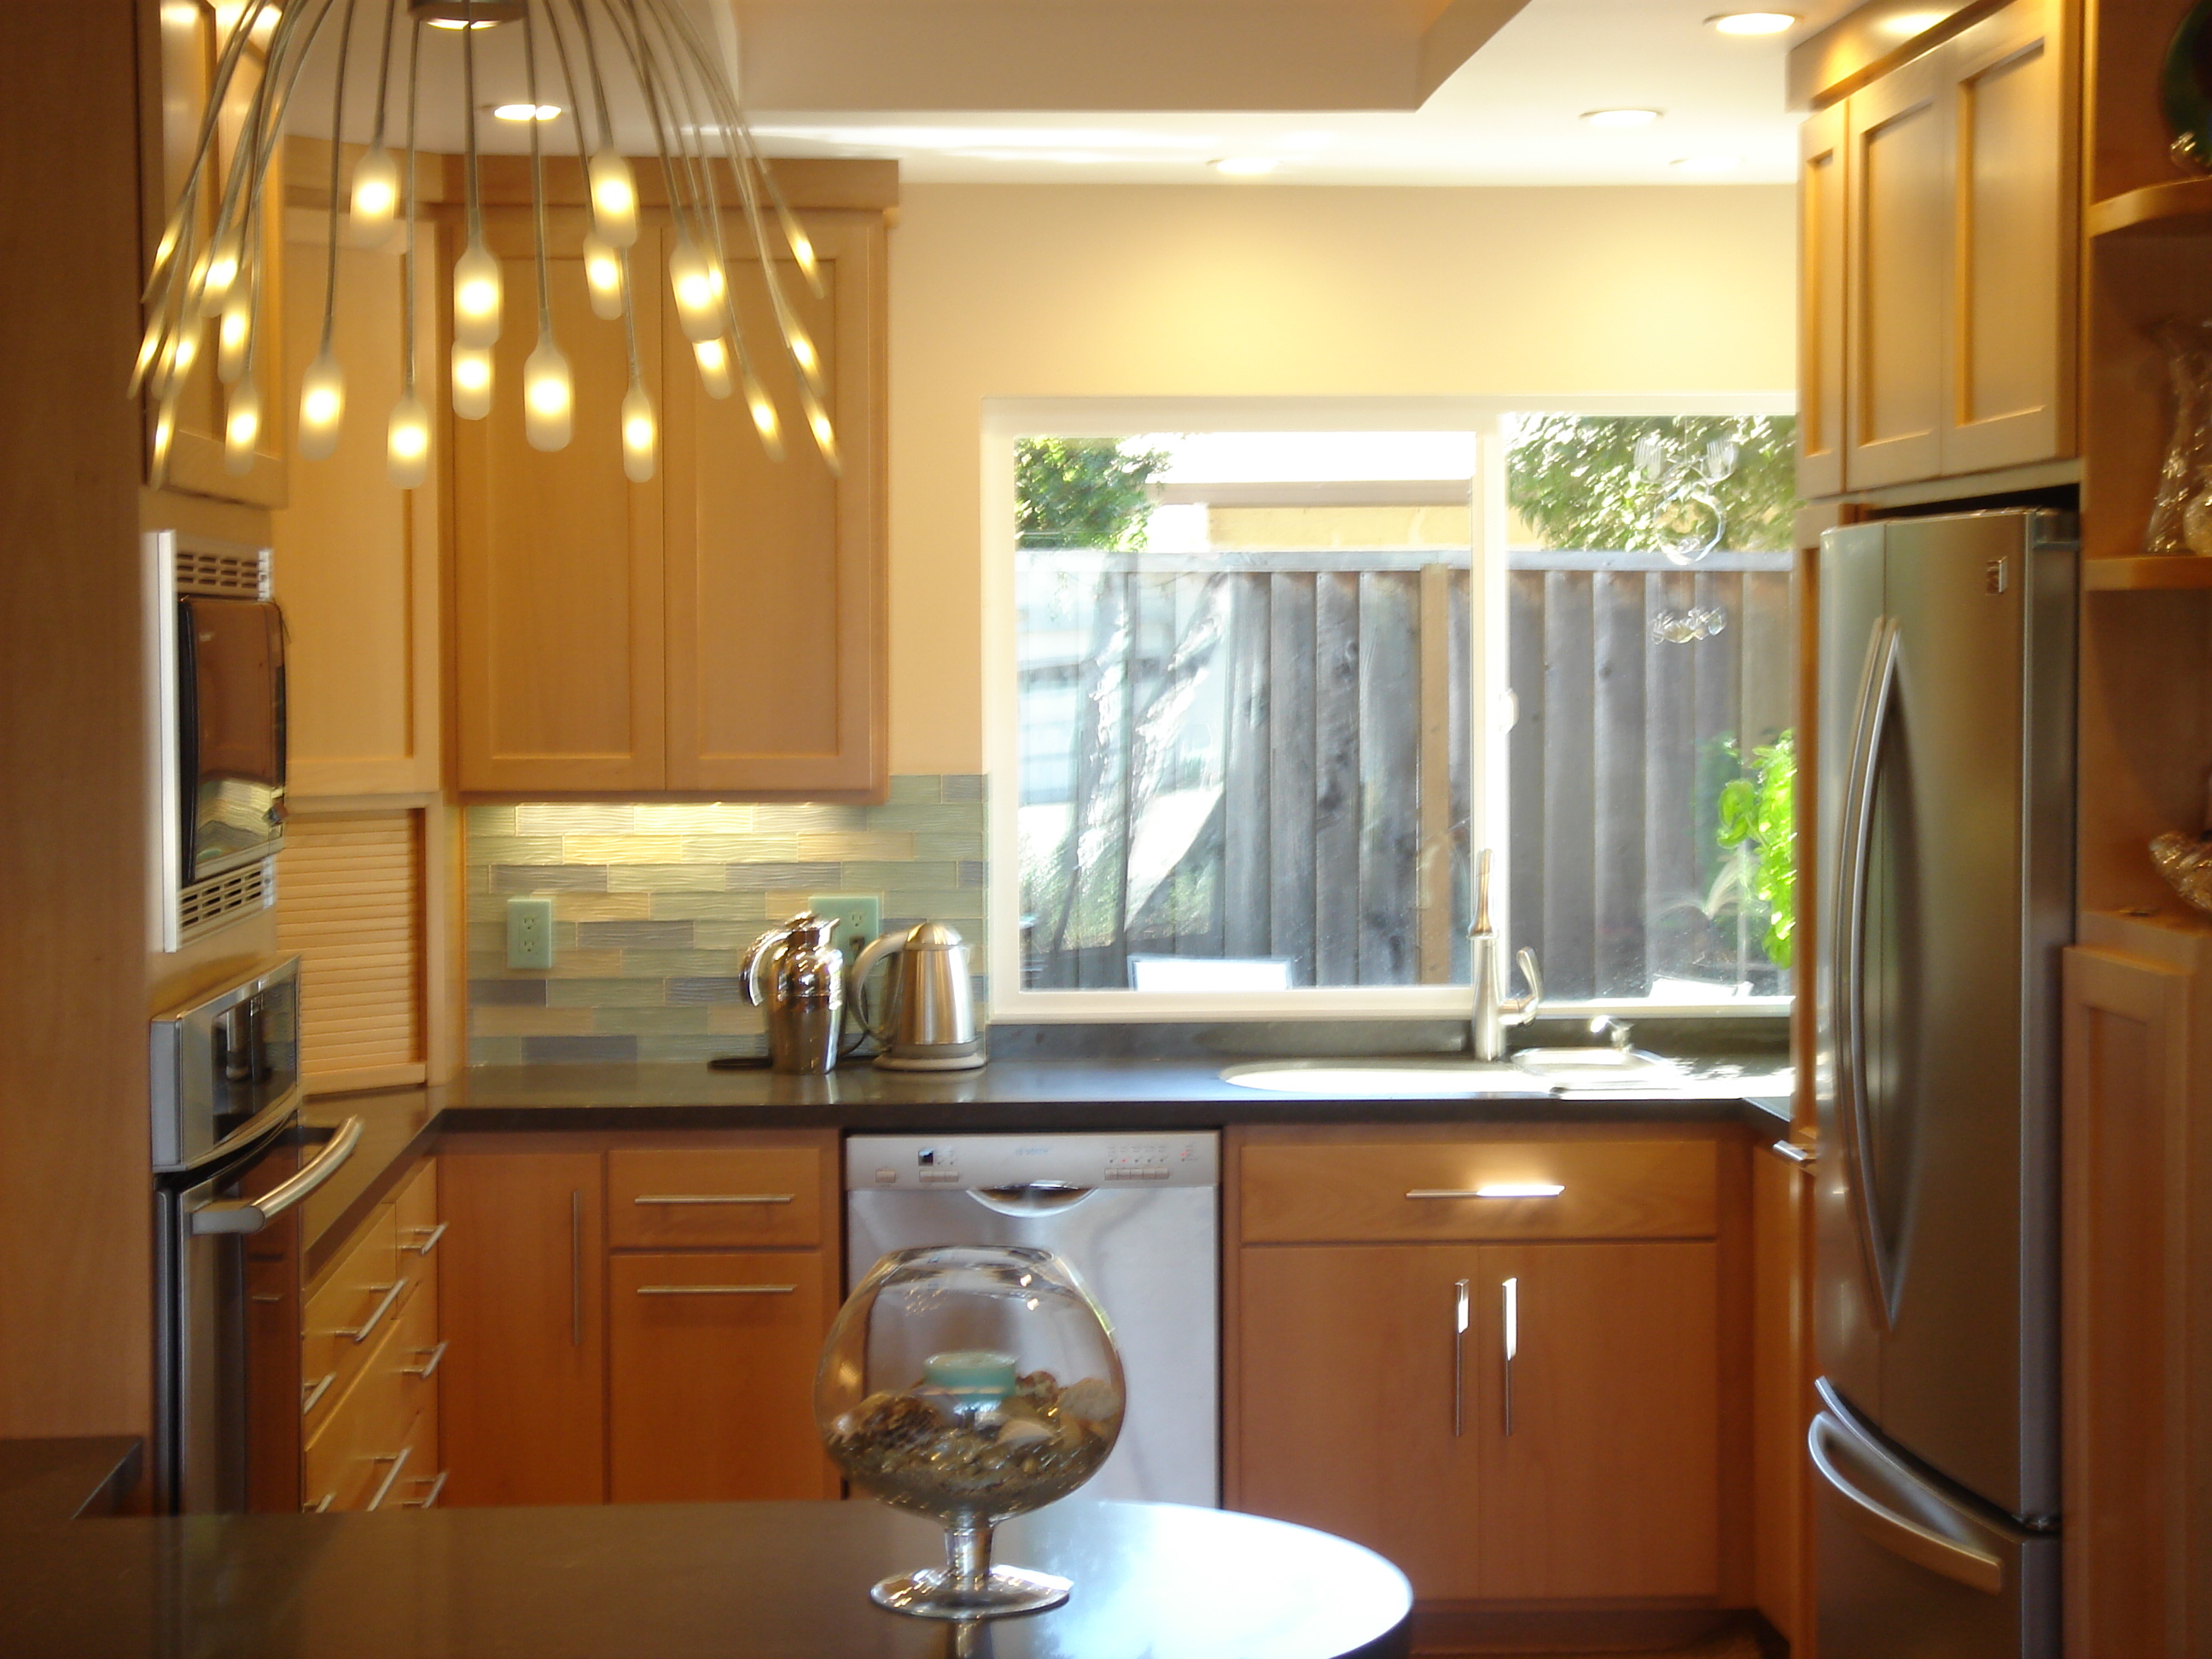
The results look great! You can see that there were some minor alterations to the design between the time the rendering was made and completion of construction. The two most visible changes are that we reduced the number of pendants over the peninsula to one (and the pendant the owner selected is the fun LED fixture from Ikea), and a change in the flooring. We had planned to reuse the existing laminate floor, but had to change that when the decision was made to extend the kitchen flooring into the dining room. The old laminate flooring was no longer being manufactured. So the owner selected a cork floor which looks fabulous and will wear well.
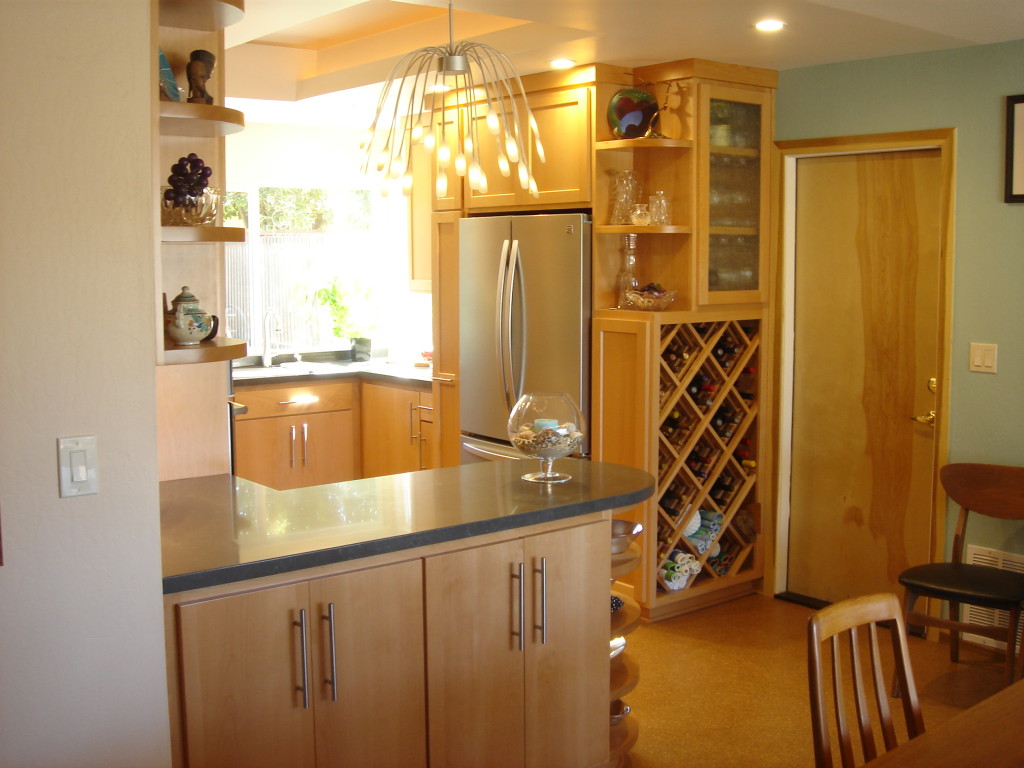
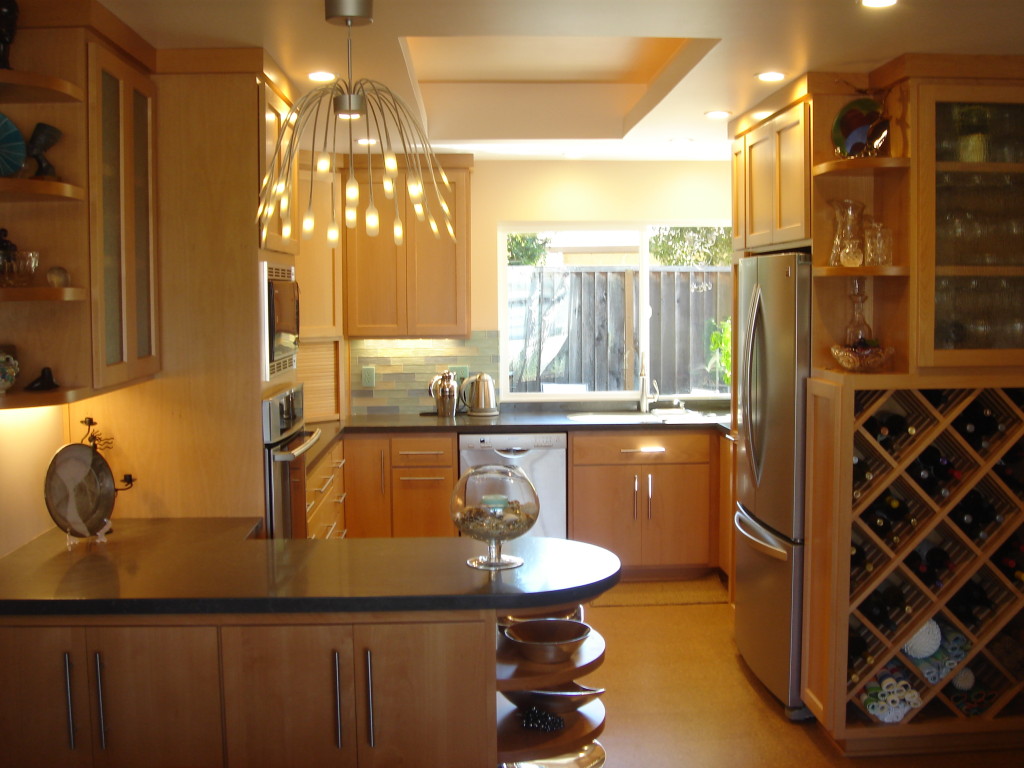
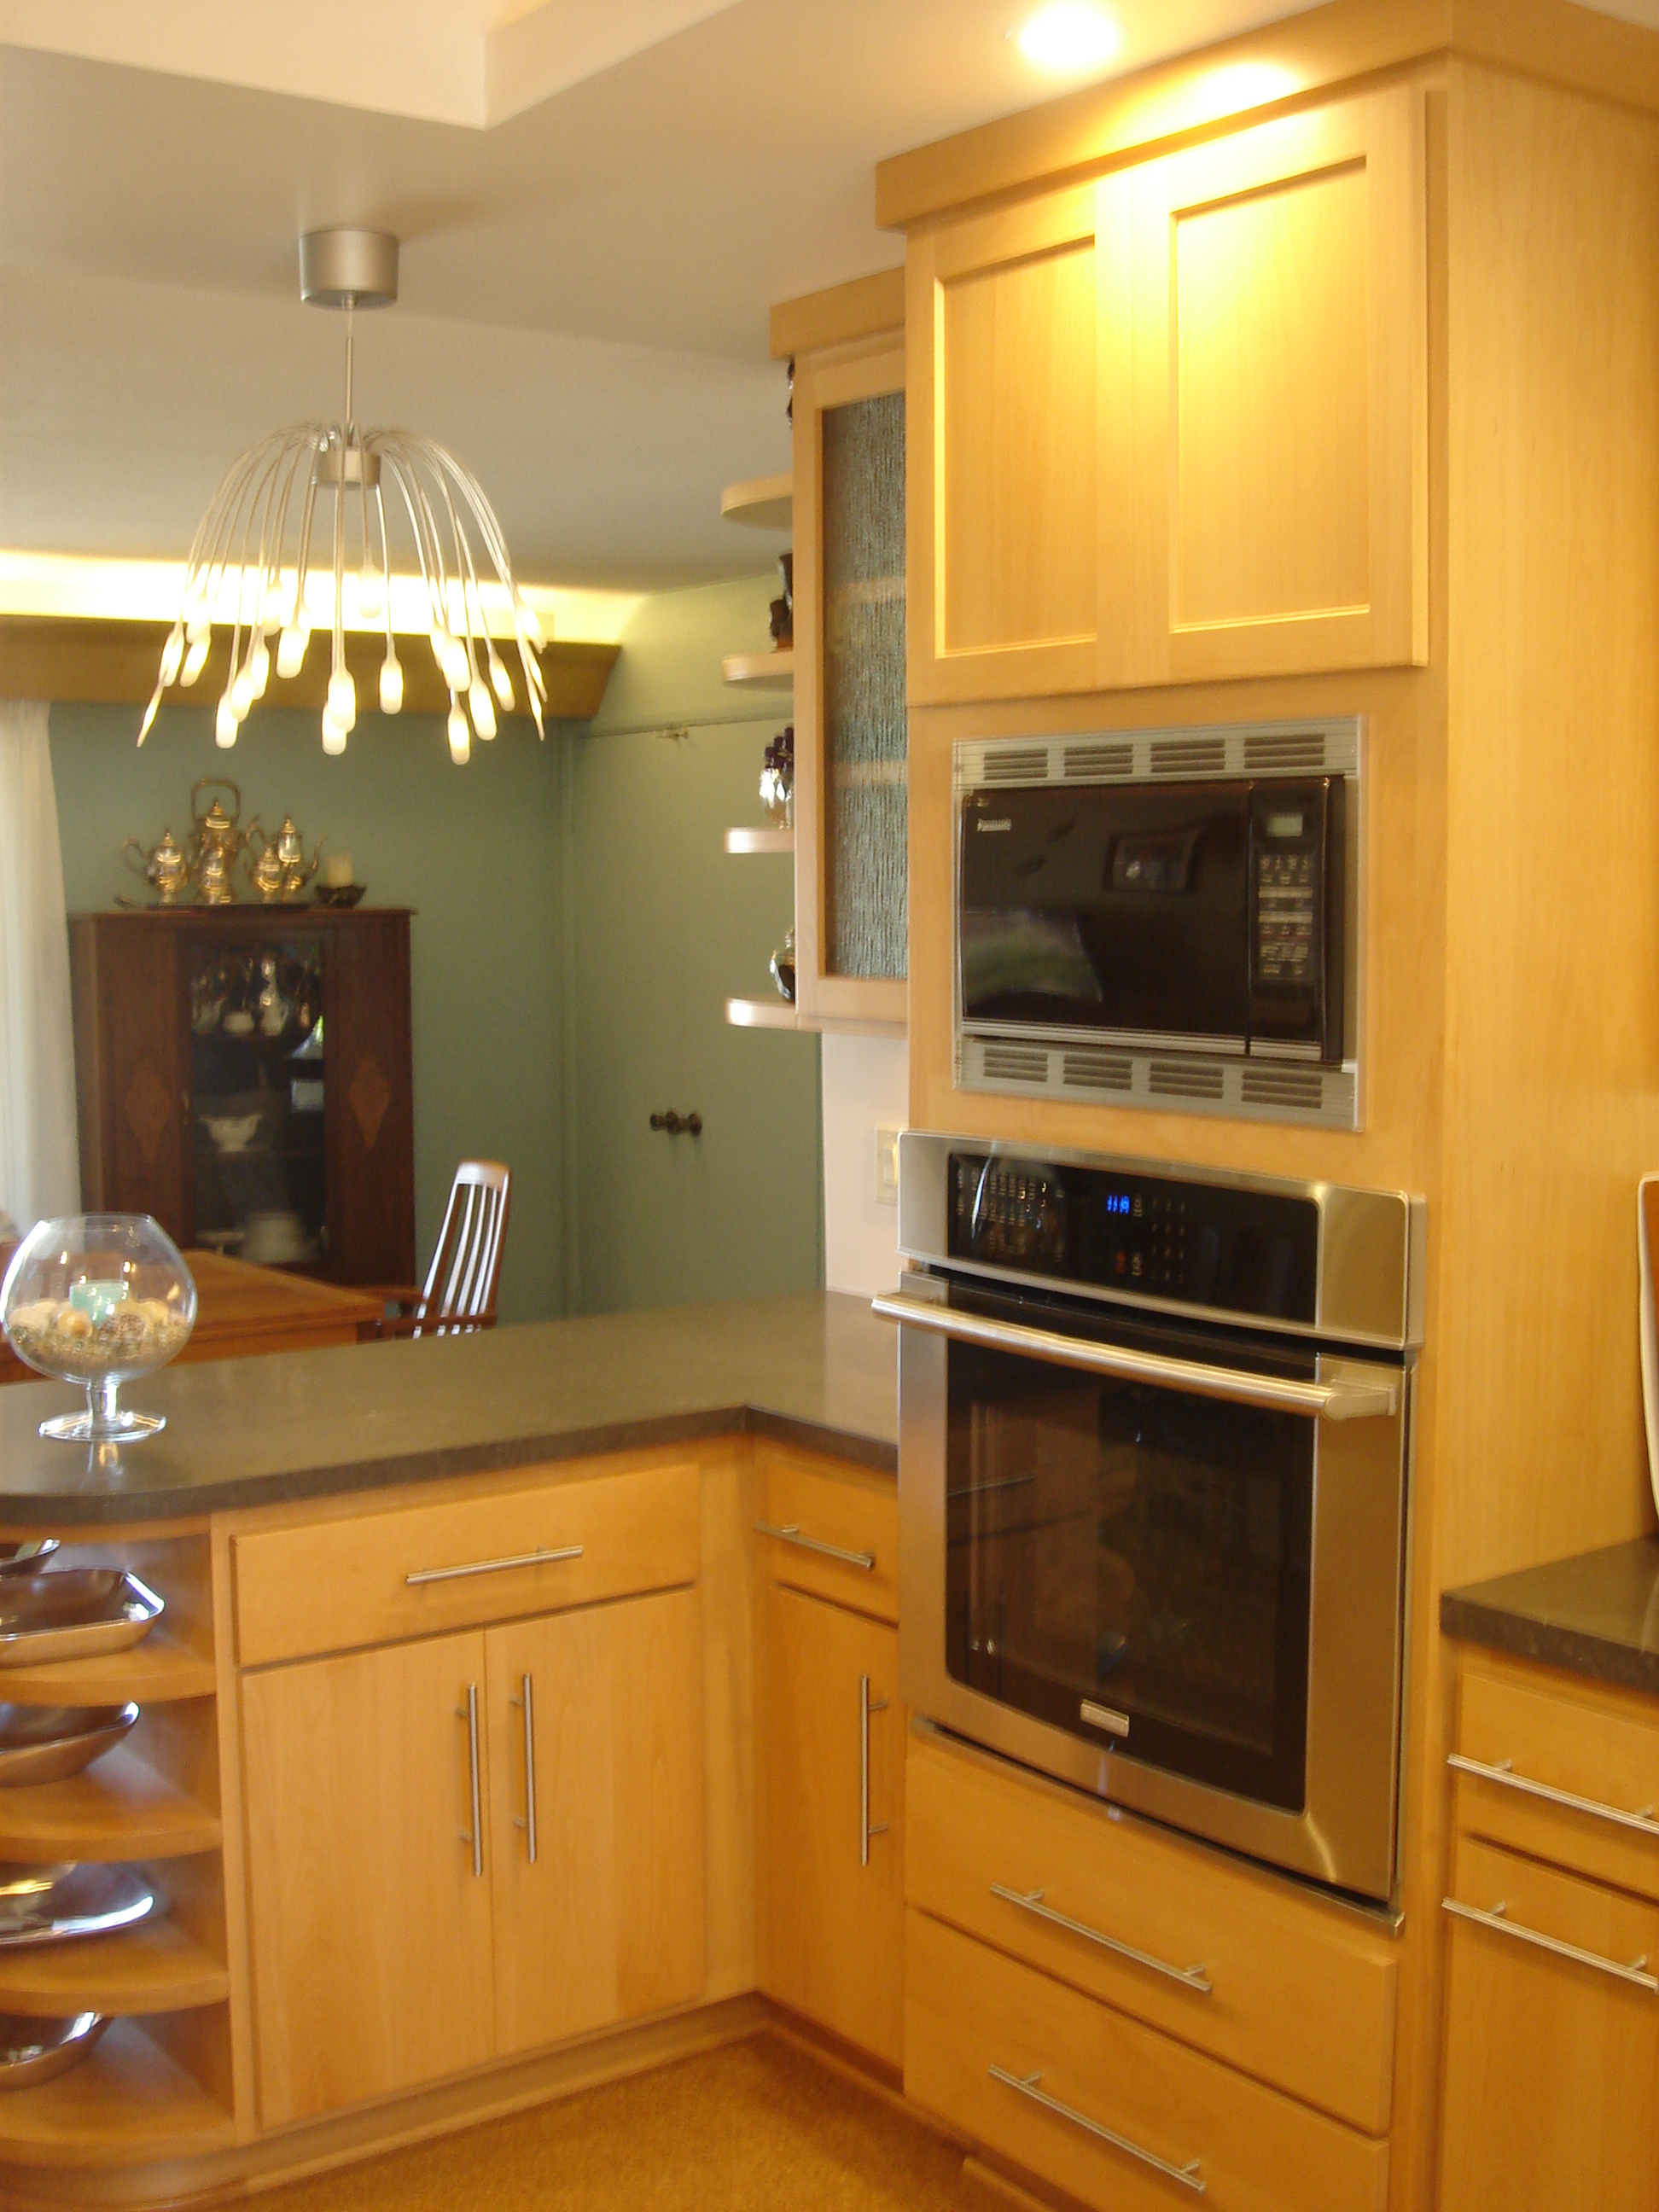
The two tall cabinets containing the built in ovens on the left and the refrigerator, pull out pantry and wine storage on the right, create a visual separation between the dining room and the working portion of the kitchen. We relocated the cook top to the left side of the room and slid the sink and dishwasher over to the right. The new layout has 4 different work/prep-stations and twice the storage space.
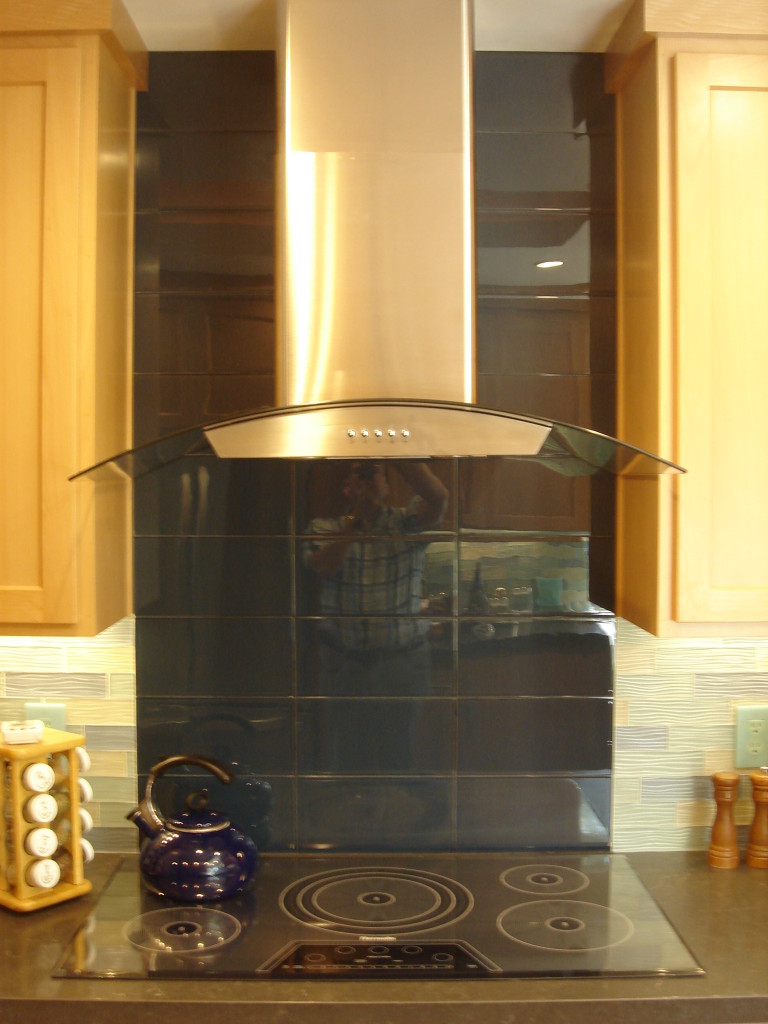
The owner opted to replace their elderly electric range with a modern glass induction cook top. The cook top is accented with a curved glass exhaust hood and a contrasting tile from the counter to the ceiling.

We created a raised area in the ceiling to help open up the confined space. The raised area is highlighted with hidden coved lighting. We also have recessed “can lights” for general illumination and under cabinet lighting for task lighting around the kitchen.
We used simple Shaker style cabinet doors for all the upper cabinets and even more simple slab fronted doors and drawers in the base cabinets. The base cabinet doors and drawers are fitted out with brushed aluminum pencil rod pulls. The upper cabinets have hidden finger pulls routed into the door frames for a clean look.
The project more than doubled the amount of counters and storage space. The new kitchen has wine storage that the old kitchen lacked. The new window over looking the back yard now has the operable section on the left (as you look out), so that food can be passed out into the back yard when the owners are entertaining. We also provided the back yard with a 10 foot long counter for serving at bar-b-ques and parties. The new kitchen is light and bright and functional. We used custom made cabinets which are fitted with a myriad of different accessories, from a spice rack in the shallow pull out just below the cook top, to two different kinds of corner cabinets so that no spaces go to waste, to the small appliance garage to hide those pesky counter top appliances. The original kitchen lasted almost 40 years. This kitchen should serve at least as long.


